
Creamy Spinach and Ricotta Stuffed Chicken: Easy 35-Minute Dinner
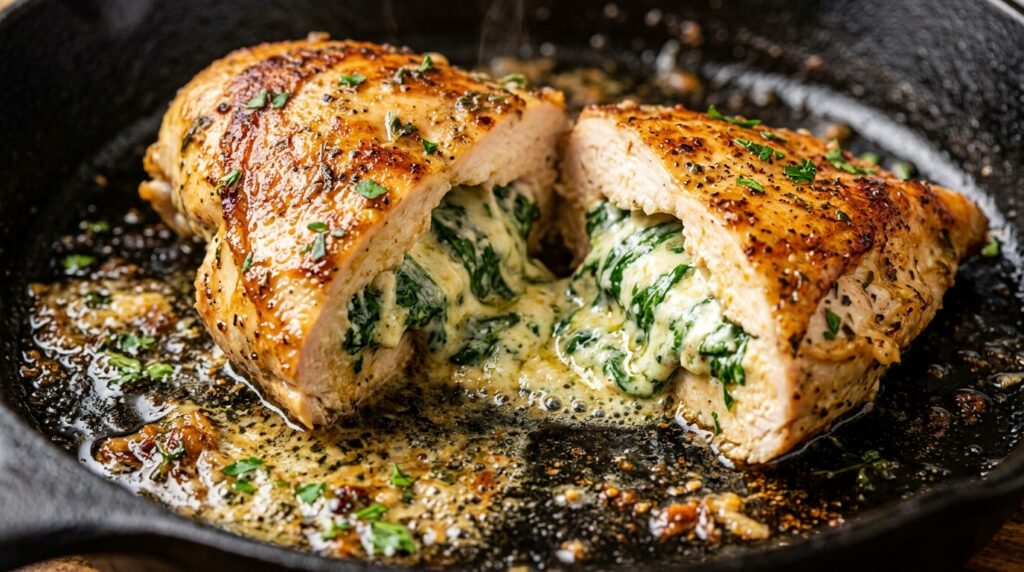
There is nothing quite as satisfying as slicing into a beautifully golden-seared chicken breast only to discover a molten, creamy swirl of garlic-herb ricotta, rich cream cheese, and tender emerald spinach melting onto your plate. This creamy spinach and ricotta stuffed chicken turns ordinary weeknight chicken into an upscale gourmet experience that feels straight out of a Mediterranean trattoria, yet it requires just thirty-five minutes from cutting board to dinner table. The beauty of stuffed chicken lies in its dual texture: the exterior develops a savory, paprika-herb crust from direct high-heat pan searing, while the interior stays extraordinarily tender and juicy thanks to the self-basting cream cheese and ricotta filling. As the skillet cooks, the cheeses gently warm and infuse the meat from the inside out, guaranteeing that even thick chicken breasts remain succulently moist with zero dry or rubbery bites. Why You’ll Love This Recipe Speed & Weeknight Simplicity: Takes only 15 minutes of prep and 20 minutes to cook, delivering a stunning restaurant-level centerpiece effortlessly. One-Pan Execution: Starts with a stove sear for deep Maillard flavor and finishes in the same cast-iron skillet, keeping kitchen cleanup minimal. Keto & Naturally Low-Carb: Boasting 48 grams of lean protein and only 3 grams of net carbohydrates per serving, it satisfies both healthy eating and pure comfort cravings. 100% Halal Wholesome: Made with pure whole-milk cheeses, aromatic garlic, cold-pressed olive oil, and herbs with strictly zero pork, zero bacon, and zero alcohol. Key Ingredients & Smart Swaps Wholesome fresh ingredients arranged neatly on a clean quartz workstation. Chicken Breasts: Look for plump, thick chicken breasts (around 7 to 8 ounces each). Thicker breasts allow you to cut a deep, spacious pocket without tearing the outer walls. Baby Spinach: Fresh baby spinach wilted down in a dry skillet or microwave has far better fresh garden flavor than frozen blocks. If using frozen spinach, squeeze out 100% of the liquid using cheesecloth to keep the filling thick. Whole Milk Ricotta: Adds authentic Italian creaminess and light fluffiness to the core. Part-skim ricotta also works if preferred. Cream Cheese: Softened block cream cheese acts as the binding agent that prevents the ricotta from turning watery under heat. Aged Parmigiano-Reggiano: Provides sharp, savory umami that cuts through the rich creaminess. Shredded low-moisture mozzarella can also be added for an epic cheese pull. Smoked Paprika & Italian Seasoning: Gives the chicken skin that gorgeous deep amber color and earthy herb aroma as it sizzles in the hot skillet. Step-by-Step Cooking Walkthrough 1. Blend the Cheesy Spinach Filling: In a mixing bowl, fold the wilted chopped spinach together with softened cream cheese, ricotta, freshly grated parmesan, minced garlic, and sea salt until smooth and uniform. 2. Cut the Pocket & Stuff: Using a sharp paring knife, slice horizontally into the thickest edge of the chicken breast to form a 3-inch deep pocket. Stuff generous spoonfuls of the spinach mixture inside, gently pressing the meat edges back together. TECHNIQUE CUE: Sear chicken undisturbed for 5 minutes per side until deeply browned before gently turning with tongs to keep the filling locked inside. 3. Season the Exterior: Pat outer surfaces dry with a paper towel and rub with olive oil, paprika, garlic powder, oregano, salt, and cracked black pepper. 4. High-Heat Sear: Melt 1 tablespoon butter with 2 tablespoons olive oil in a hot cast-iron skillet. Sear the chicken undisturbed for 5 minutes on the first side until deep mahogany-brown, then flip carefully with kitchen tongs for 4 minutes on the second side. 5. Finish & Rest: Transfer skillet into an oven preheated to 375°F (190°C) for 10 to 12 minutes until an instant-read thermometer reads 165°F (74°C). Allow the breasts to rest 5 minutes on a warm cutting board before slicing into thick medallions. 3 Chef Secrets for Perfect Results 1. The 3/4 Pocket Rule: When slicing the pocket, keep your palm flat on top of the chicken breast and insert the knife horizontally, stopping at least half an inch from the sides and back. Cutting through will cause your delicious filling to leak out during cooking. 2. Eliminate All Spinach Moisture: Excess water in spinach turns cheese fillings runny. After wilting fresh spinach, always press it firmly in paper towels to squeeze out all green liquid before mixing with the cheeses. 3. Always Rest Before Slicing: If you slice immediately after removing from heat, the melted cheese filling will run out like a river. Resting for 5 minutes allows the molten cheese to settle into a clean, sliceable spiral. What to Serve With Stuffed Chicken Served restaurant-style over garlic parmesan mashed potatoes with crisp roasted asparagus spears. Garlic Mashed Potatoes: Creamy Yukon gold potatoes catch all the savory melted herb pan drippings for pure comfort. Roasted Green Asparagus: Tossed in olive oil and coarse sea salt, roasted asparagus spears provide crisp color contrast. Crispy Lemon Green Beans: Blistered in a skillet with lemon zest to cut through the rich cheese filling. Warm Artisan Sourdough: Crusty bread is unbeatable for soaking up the pan juices left on the plate. Storage, Freezing & Reheating Instructions Refrigeration: Allow leftover stuffed chicken to cool completely before storing in an airtight glass container in the fridge for up to 4 days. Gentle Oven / Air Fryer Reheating: To preserve the crisp exterior and keep the cheesy filling creamy, reheat in an air fryer or oven at 350°F (175°C) for 6 to 8 minutes. Avoid high-power microwaving which can make chicken rubbery. Freezing Meal Prep: You can stuff the raw chicken breasts, wrap tightly in plastic wrap and aluminum foil, and freeze for up to 2 months. Thaw completely in the refrigerator overnight before searing as directed. Frequently Asked Questions Do I need toothpicks to close the chicken breasts? While toothpicks help keep the seam closed, they are optional if you sear the breasts carefully. If you do use wooden toothpicks, remember to remove them before slicing and serving! Can I bake the stuffed chicken entirely in the oven without searing? Yes,
Creamy Garlic Parmesan Chicken Skillet: Easy 30-Minute Dinner

When the clock is ticking on a busy weeknight and you crave a meal that tastes like an intimate Italian bistro dinner, this creamy garlic parmesan chicken skillet is your ultimate kitchen savior. Golden, herb-crusted chicken cutlets seared to juicy perfection and smothered in a velvety garlic parmesan cream sauce create an irresistible aroma that draws everyone straight to the table. Best of all, this entire restaurant-quality dish comes together in just thirty minutes in a single skillet. The secret to achieving extraordinary depth in such a quick recipe lies in fond caramelization and layering flavors. Searing the seasoned cutlets over medium-high heat leaves behind savory roasted drippings in the skillet. Sautéing fresh minced garlic in melted butter and immediately deglazing with rich chicken bone broth lifts every bit of concentrated flavor directly into the sauce, creating a glossy foundation before the heavy cream and freshly grated parmesan melt into pure luxury. Why You’ll Love This Recipe Speed & Convenience: Ready in just 30 minutes from prep to table, making it ideal for hectic weeknights when time is precious. One-Pan Simplicity: Everything cooks in a single cast-iron or stainless steel skillet, minimizing cleanup to almost zero. Wholesome & 100% Halal: Crafted with pure low-sodium chicken bone broth, real dairy, and aromatic herbs with zero alcohol and zero pork. Velvety Restaurant Flavor: The combination of freshly grated Parmigiano-Reggiano, sweet sautéed garlic, and rich cream rivals high-end Italian eateries. Key Ingredients & Smart Swaps Fresh, quality ingredients arranged cleanly on a quartz workstation. Chicken Breasts: Boneless, skinless breasts sliced horizontally into thin cutlets cook rapidly and stay exceptionally tender. You can also use boneless chicken thighs for extra juiciness. Fresh Garlic Cloves: Use 6 full cloves of fresh garlic rather than jarred varieties to unlock that sweet, mellow aroma that defines this dish. Chicken Bone Broth: Rich low-sodium bone broth adds gelatinous body and savory depth for deglazing. Avoid wine or alcohol entirely—the natural acidity of a squeeze of lemon at the end provides the ideal brightness. Heavy Whipping Cream: Full-fat cream is essential because its high butterfat prevents the sauce from curdling when mixed with cheese and heat. For a lighter twist, half-and-half mixed with a teaspoon of cornstarch works nicely. Parmigiano-Reggiano: Always grate your parmesan fresh from a block. Pre-shredded bagged cheese contains anti-caking starches that cause sauces to become grainy rather than silky. Fresh Herbs: Chopped Italian flat-leaf parsley and dried oregano provide vibrant color contrast and herbaceous balance against the rich cream. Step-by-Step Cooking Walkthrough 1. Prep & Season the Cutlets: Slice the chicken breasts in half horizontally to create thinner cutlets. Pat them thoroughly dry with paper towels to ensure a crisp, golden crust, then season both sides evenly with garlic powder, dried Italian herbs, sea salt, and coarse black pepper. 2. Golden Pan Sear: Heat extra virgin olive oil in a wide 12-inch skillet over medium-high heat until hot. Cook chicken undisturbed for 4 to 5 minutes per side until deeply browned. Transfer to a warm plate and let rest. TECHNIQUE CUE: Stir the cream and grated parmesan gently on medium-low heat until glossy and velvety before returning the seared chicken. 3. Sauté Garlic & Deglaze Fond: Melt unsalted butter in the same skillet over medium heat. Stir in the minced garlic and sauté for 60 seconds until fragrant. Pour in the chicken bone broth, using your wooden spoon to firmly scrape the caramelized fond off the bottom of the pan. 4. Build the Silky Cream Sauce: Turn heat to medium-low and pour in the heavy cream. Let it gently simmer for 2 to 3 minutes until lightly bubbling. Remove from direct high heat and whisk in the freshly grated parmesan cheese in batches until completely melted and glossy. 5. Nestle & Glaze: Slide the golden chicken cutlets and all accumulated resting juices back into the skillet. Spoon the bubbling garlic cream sauce over the cutlets, allow them to warm through for 2 minutes, and finish with fresh parsley. 3 Chef Secrets for Perfect Results 1. Dry Chicken Is King: Moisture is the enemy of browning. Always pat chicken dry with paper towels before seasoning. This creates immediate Maillard browning in the pan rather than steaming the meat. 2. Control Pan Temperature Before Adding Dairy: Never dump heavy cream or parmesan into a smoking hot skillet. Lower the heat to medium-low so the dairy heats smoothly without breaking or separating into oil. 3. Grate Your Own Cheese Fresh: Pre-shredded parmesan is coated in cellulose to prevent clumping in plastic tubs. Freshly grated cheese melts seamlessly into the warm cream, creating that signature restaurant velvet texture. What to Serve With Garlic Parmesan Chicken Served restaurant-style over al dente fettuccine with roasted tender asparagus spears. Al Dente Pasta: Fettuccine, penne, or angel hair tossed directly with extra garlic parmesan sauce is an unforgettable pairing. Roasted Green Vegetables: Roasted asparagus spears, blistered green beans, or steamed broccoli cut through the rich cream sauce with fresh crunch. Warm Artisan Garlic Bread: Crisp sourdough bread or warm focaccia is perfect for swiping up every single drop of delicious garlic cream from your plate. Steamed Jasmine Rice or Cauliflower Mash: For a low-carb option, serve over garlic cauliflower puree to soak up the sauce guilt-free. Storage, Freezing & Reheating Instructions Refrigeration: Cool leftovers to room temperature and store in an airtight glass container in the refrigerator for up to 4 days. Gentle Stovetop Reheating: Cream sauces separate when microwaved on high power. For best results, reheat chicken and sauce gently in a skillet over low heat, adding 1 to 2 tablespoons of chicken broth or milk to bring the sauce back to its silky texture. Freezing Guidelines: While cooked chicken freezes well for up to 3 months, heavy cream sauces can slightly change texture upon thawing. If freezing, freeze the seared chicken separately, then whip up fresh 5-minute garlic cream sauce the day of serving. Frequently Asked Questions Can I use half-and-half instead of heavy cream? Yes, you can substitute half-and-half,
Delicious Artichoke Bread Recipe with Creamy Cheese Blend
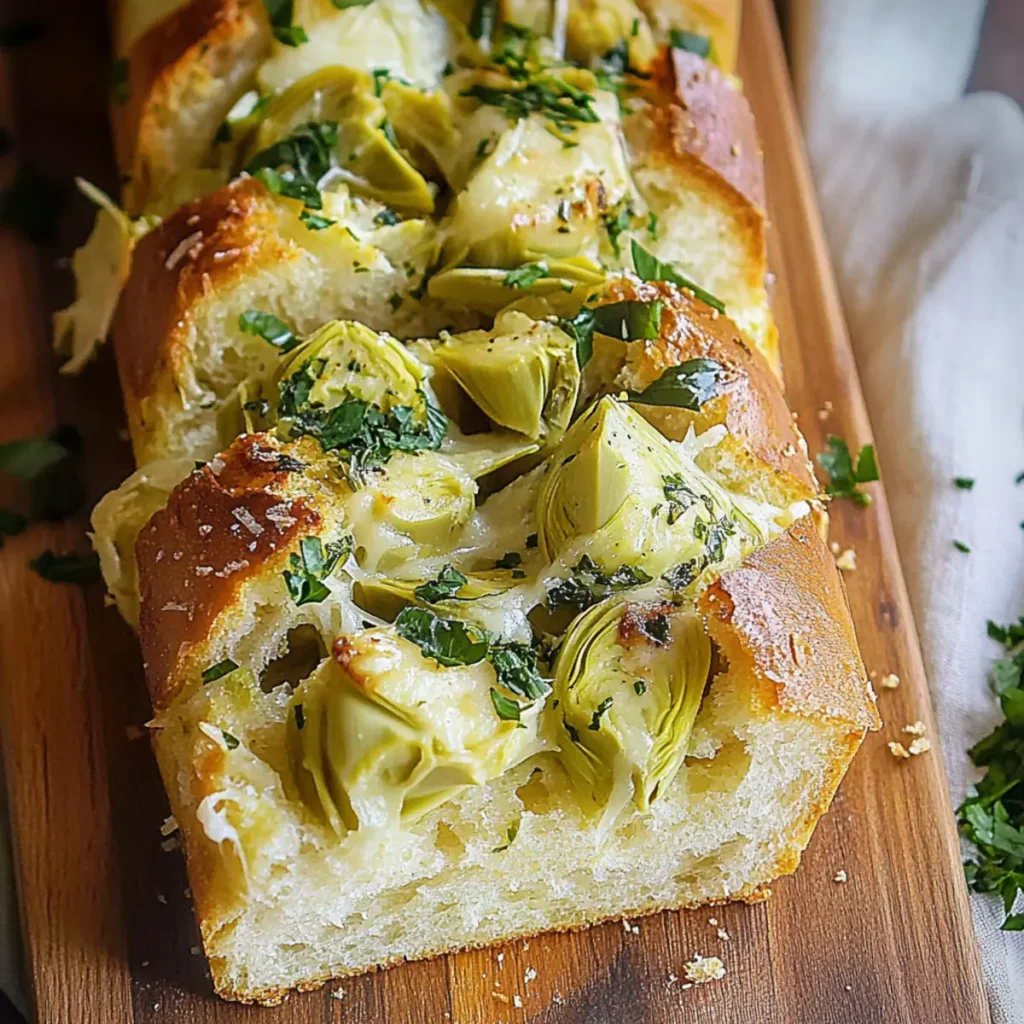
Artichoke bread is like a warm hug wrapped in a cozy loaf. Picture this: a golden-brown crust that gives way to a creamy, cheesy interior bursting with the delightful tang of artichoke hearts. The aroma wafts through your kitchen, teasing your taste buds with promises of savory goodness. If you’re a fan of robust flavors mingling harmoniously, this dish will surely join your recipe repertoire, becoming your go-to comfort food for chilly nights or spontaneous gatherings. But wait, there’s more! I have a fond memory attached to making artichoke bread. It was one of those weekends when I decided to throw an impromptu get-together with friends. You know, the kind where you end up standing in the kitchen, chatting and snacking? As this bread baked and filled the house with its mouthwatering scent, everyone seemed to gather closer, like moths to a flame. The smiles and compliments that followed with each bite are etched in my heart, reminding me that food is much more than sustenance – it’s about connection and joy. Ingredients for Artichoke Bread Here’s what you’ll need to make this delicious Artichoke Bread: 1 can Artichoke hearts – Choose quality artichokes, preferably in water or oil for a richer flavor. 8 oz Cream cheese – Softened to room temperature, this will provide that luscious, creamy base. 1/2 cup Sour cream – Adds tang and creaminess; Greek yogurt can be a great substitute if needed. 1 tsp Garlic powder – Use this to infuse that beloved garlicky aroma into the mix. 1 cup Shredded mozzarella cheese – This is your melty cheese pulling everything together beautifully. 1/2 cup Parmesan cheese – Adds a delightful nuttiness and bite that elevates the dish. 2 cups All-purpose flour – To provide the structure for our lovely bread. 1 tbsp Baking powder – This will help the bread rise and create a fluffy texture. 1 tsp Salt – Enhances all the flavors in this delicious creation. 1 tsp Pepper – Just a hint of spice to keep things interesting. Fresh herbs (like parsley or chives) – Chop these up for a fresh finish, adding color and flavor. How to Make Artichoke Bread Follow these simple steps to prepare this delicious Artichoke Bread: Step 1: Preheat Your Oven Preheat your oven to 350°F (175°C). While the oven warms, grease a loaf pan with a bit of butter or nonstick cooking spray, ensuring easy release later. Step 2: Prepare the Cheesy Mixture In a large mixing bowl, combine the drained artichoke hearts, softened cream cheese, sour cream, garlic powder, shredded mozzarella, and Parmesan cheese. Stir until all the ingredients meld into a rich, creamy mixture. Step 3: Whisk the Dry Ingredients In another bowl, whisk together the all-purpose flour, baking powder, salt, and pepper. This will ensure even distribution of the leavening agent throughout the bread, making it perfectly fluffy. Step 4: Combine Wet and Dry Ingredients Gradually fold the dry ingredients into the wet mixture. Be gentle; you want everything to blend well without overmixing. It’s like a dance, where you want to unite but not crush the showstopper. Step 5: Transfer to the Loaf Pan Spoon the mixture into your greased loaf pan, smoothing the top with a spatula. Sprinkle fresh herbs on top if you’d like a burst of color and flavor. Step 6: Bake Until Golden Brown Bake in the preheated oven for about 20-25 minutes or until the top is golden brown and a toothpick inserted into the center comes out clean. The smell will whisk you away into a world of culinary delight. Now that your artichoke bread is ready, transfer it to a cooling rack for a few minutes before slicing. It’s best served warm, either on its own or paired with a fresh salad or dipping oils. Each bite brimming with creaminess and flavor will leave you longing for more. Enjoy! Perfecting Artichoke Bread Cooking Process Start by preheating your oven to ensure a steady temperature. Mix the wet ingredients first to allow the flavors to meld, then incorporate the dry ingredients efficiently. Finally, bake until golden brown for that perfect texture. Add Your Touch to Artichoke Bread Get creative with your Artichoke Bread by swapping in different cheeses like cheddar for a sharper taste or adding sun-dried tomatoes for a punch of flavor. You can also experiment with fresh herbs to enhance the aroma. Storing & Reheating Artichoke Bread Allow the Artichoke Bread to cool completely before wrapping it tightly in plastic wrap. Store it in the fridge for up to three days. When reheating, aim for a low oven temperature to keep it from drying out. Baking this Artichoke Bread reminds me of a family dinner where my relatives were competing for the best dish. The smiles on everyone’s faces when they took a bite made it truly special, and of course, I took home the trophy for best flavor! FAQs About Artichoke Bread What is Artichoke Bread? Artichoke Bread is a delightful dish that combines creamy cheeses and tender artichoke hearts, baked into a fluffy bread loaf. It’s a perfect blend of flavors, making it an ideal appetizer or snack. With its cheesy goodness and aromatic hints of garlic and fresh herbs, this bread is not only delicious but visually appealing too. Whether you serve it at a family gathering or enjoy it at a cozy dinner, Artichoke Bread is sure to impress your guests and elevate any meal. How do you make Artichoke Bread? Making Artichoke Bread is quite simple! Start by mixing cream cheese, sour cream, and artichoke hearts in a bowl. Add some shredded mozzarella and Parmesan cheese for that rich flavor. In another bowl, whisk together flour, baking powder, salt, and pepper. Combine the wet and dry ingredients, spoon the mixture into a greased loaf pan, and bake until golden brown. In just about 30 minutes, you’ll have a warm, cheesy delight ready for enjoyment! Can I customize my Artichoke Bread? Absolutely! One of the best features of
Refreshing Emerald Green Mocktail Recipe for Summer Sips

Emerald Green Mocktails are the delightful elixirs that transport you to a sun-soaked afternoon in the garden, where refreshing flavors mingle and every sip feels like a celebratory cheer. Imagine crisp cucumber dancing with the zesty pops of lime and the invigorating spirit of fresh mint, creating a harmony of textures and aromas that sing of summer fun. This recipe is not just about making a drink; it’s about crafting an experience, a moment where you can kick back and enjoy with friends or family. Whether you’re having a casual barbecue or just lounging on a lazy Sunday, this Emerald Green Mocktail is your ticket to a mini getaway! Ingredients for Emerald Green Mocktail Here’s what you’ll need to make this delicious Emerald Green Mocktail: 1 cup fresh cucumber – Choose firm, unblemished cucumbers for optimal juiciness; they’re the star of this refreshing drink. 1 tablespoon lime juice – Freshly squeezed for the best flavor, lime juice adds zing to each sip. 10 leaves mint – Fresher is better! Choose vibrant green leaves for a minty burst that invigorates the drink. ½ cup sparkling water – This bubbly addition gives the mocktail a delightful fizz that will bring a smile to your face. 1 slice lime – A lovely garnish that not only looks pretty but enhances the zesty freshness of the drink. 1 sprig mint – For that extra touch of minty elegance, this will finish your mocktail beautifully. 1-2 teaspoons honey or agave syrup – Depending on your sweetness preference, this is the perfect way to balance the tartness of lime. How to Make Emerald Green Mocktail Follow these simple steps to prepare this delicious Emerald Green Mocktail: Step 1: Prepare the Ingredients Start by washing the cucumber and mint leaves thoroughly. Slice the cucumber into small pieces so it blends easily, and set aside the mint leaves for later. Step 2: Mix the Base In a sturdy glass, combine the cucumber pieces, lime juice, and mint leaves. Use a muddler or the back of a spoon to gently mash the ingredients. This releases the cucumber’s juices and the mint’s aromatic oils. Step 3: Add Sparkle Pour in the sparkling water and stir the mixture gently. You want to keep that fizziness intact, so be gentle like a feather landing on a soft cloud. Step 4: Sweeten to Taste Drizzle honey or agave syrup into your mocktail. Stir again and taste to see if it meets your sweetness level. Adjust according to your liking—it’s your drink after all! Step 5: Garnish and Present Take a slice of lime and a sprig of mint and use them as garnishes on top of your mocktail. They not only beautify the drink but also enhance those exciting aromas every time you sip. Step 6: Serve and Enjoy Fill a nice glass with ice, pour in your emerald mixture, and take a moment to admire your work before taking that first refreshing sip! Cheers to summer vibes! This mocktail is not just a drink; it’s a celebration in a glass. Picture yourself lounging on the patio, conversations floating in the air, and laughter resonating as everyone enjoys their Emerald Green Mocktails. It’s perfect for gatherings, BBQs, or simply enjoying a quiet evening after a long day. So, are you ready to transform some basic ingredients into a vibrant wow factor? Grab your cucumber and lime, and let’s get mixing! Perfecting Emerald Green Mocktail Cooking Process To master the Emerald Green Mocktail, start by juicing the lime and chopping the cucumber. Then, place the cucumber and mint in your glass, add lime juice, and finish with sparkling water for the perfect fizz. Add Your Touch to Emerald Green Mocktail Feel free to mix things up with your Emerald Green Mocktail! Swap out cucumber for fresh basil for an herbal twist or use lemon juice in place of lime for a tangy variation. Storing & Reheating Emerald Green Mocktail This mocktail is best enjoyed fresh, but you can store leftovers in the fridge for up to one day. Just give it a gentle stir before serving again; no need for reheating! Finding that perfect recipe tends to come from a place of trial and error. I once mixed my drinks for a summer barbecue, and my friends couldn’t stop raving about this Emerald Green Mocktail—now it’s the highlight of every gathering! FAQs About Emerald Green Mocktail What is Emerald Green Mocktail? The Emerald Green Mocktail is a refreshing non-alcoholic beverage made primarily from fresh cucumber, lime juice, and mint leaves. This vibrant drink combines the crispness of cucumbers with the zesty tang of lime, creating a deliciously refreshing experience, perfect for summer gatherings or simply to quench your thirst. The addition of sparkling water adds a delightful fizz, making it a fantastic alternative to sugary sodas or alcoholic drinks. How do I make the Emerald Green Mocktail? Making an Emerald Green Mocktail is incredibly simple! Start by combining fresh cucumber slices, a tablespoon of lime juice, and 10 mint leaves in a glass. Then, gently stir in half a cup of sparkling water. For an extra touch of flavor, adjust the sweetness with honey or agave syrup to your liking. Finally, garnish with a slice of lime and a sprig of mint for that picture-perfect finish! Can I customize my Emerald Green Mocktail? Absolutely! One of the best things about the Emerald Green Mocktail is its versatility. You can swap out cucumber for fresh basil to add an herbal twist, or use lemon juice instead of lime for a different zesty kick. Feel free to experiment with additional fruits like strawberries or even a splash of coconut water for an exotic vibe. The possibilities are endless, letting you make this mocktail your own! How long can I store the Emerald Green Mocktail? For the best flavor experience, it’s recommended to enjoy your Emerald Green Mocktail fresh. However, if you have leftovers, you can store them in the refrigerator for up to one day.
Easy Quick Smash Burger Sauce Recipe for Flavorful Burgers
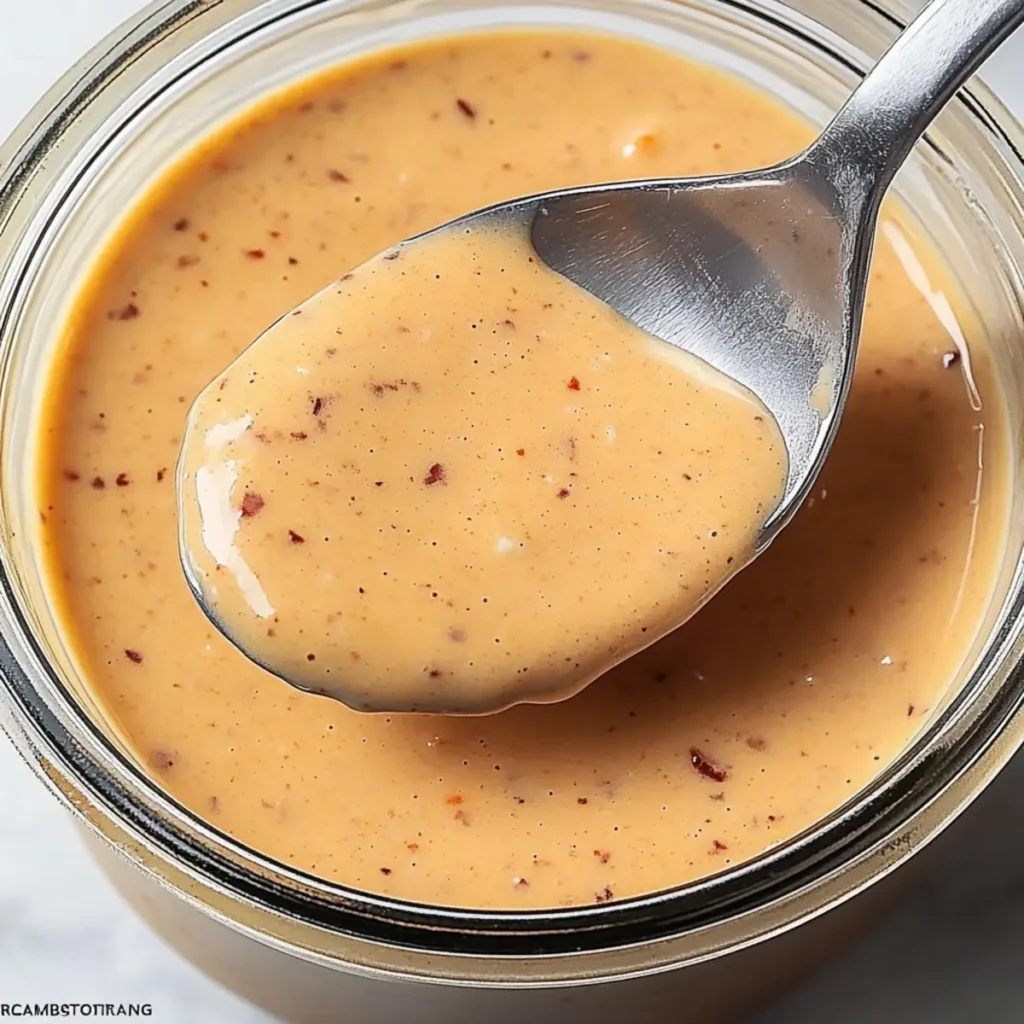
The moment you catch a whiff of burgers sizzling on the grill, your mouth fills with anticipation for that juicy, flavorful bite. Now, imagine the perfect companion to that beefy goodness: a Quick Smash Burger Sauce that elevates every element on your plate into a flavor explosion. This velvety, tangy sauce delivers an irresistible combination of creamy mayonnaise, zesty ketchup, and a hint of mustard that will have you fighting your family and friends for the last dollop. Trust me; if you’re looking to impress at your next barbecue or weekday dinner, this sauce is your secret weapon. Ingredients for Quick Smash Burger Sauce Here’s what you’ll need to make this delicious Quick Smash Burger Sauce: 1 cup mayonnaise – The creamy base adds richness while balancing out the tanginess of other ingredients. 1/2 cup ketchup – This sweet and tangy staple brings a comforting familiarity that pairs beautifully with crumbled burgers. 2 tablespoons Dijon mustard – Sharp and zesty, Dijon gives your sauce an added punch and elevates the flavors. 1 teaspoon garlic powder – A dash of this aromatic adds depth and a savory note that you won’t forget. 1 teaspoon paprika – This not-so-secret ingredient adds warmth and a hint of smokiness to round out the taste. 1/2 teaspoon salt – Just the right amount enhances the flavor profile without overwhelming it. 1/2 teaspoon black pepper – A sprinkle of pepper adds a bit of kick to wake up your taste buds. How to Make Quick Smash Burger Sauce Follow these simple steps to prepare this delicious Quick Smash Burger Sauce: Step 1: Gather Your Ingredients Before making the magic happen, arrange all your ingredients on the countertop. This way, you won’t be searching for the mustard while juggling a stubborn jar of mayonnaise. Step 2: Mix Mayonnaise and Ketchup Grab a medium bowl and mix the mayonnaise and ketchup together until they are fully blended. This creamy base is the heart of your Quick Smash Burger Sauce, and a little elbow grease ensures a smooth consistency. Step 3: Add the Flavor Bombs Incorporate the Dijon mustard, garlic powder, and paprika into the mix. Go ahead and give it a good stir! If you want to take a taste test (and I know you will), do it now and adjust the seasonings to your liking. You might find you want it a little tangier or spicier. Step 4: Season It Right Now it’s time to sprinkle in the salt and black pepper. Stir one last time so every flavor is excited to meet your burgers. Use your culinary superpower to taste and fine-tune if needed. Step 5: Chill and Commit Cover the bowl with plastic wrap and let your creation chill in the refrigerator for at least 30 minutes. This allows the flavors to meld and develop, making every bite a taste explosion. Step 6: Serve It Up Once your sauce is ready, serve it generously over your smash burgers or use it as a delightful dip for golden fries. Don’t be shy—sauce it up! So there you have it: a Quick Smash Burger Sauce that’s so simple yet packed with flavor, it will leave you and your guests wanting more. Whether you’re hosting a backyard barbecue, a casual family dinner, or just indulging in a home-cooked meal, trust this sauce to take your burgers to new flavor heights. Now, fire up that grill and savor the magic of burger night! This showstopping Quick Smash Burger Sauce delivers restaurant-quality results using simple ingredients you probably already have at home. The perfect balance of textures and flavors creates an unforgettable dining experience that will have everyone asking for seconds. Picture-perfect presentation with vibrant colors makes this dish absolutely Instagram-worthy and guaranteed to impress any dinner guest. Incredibly versatile recipe that works beautifully for weeknight dinners, meal prep, special occasions, or even outdoor entertaining sessions. Perfecting Quick Smash Burger Sauce Cooking Process To make the most of your Quick Smash Burger Sauce, prepare all ingredients ahead of time. Start by blending mayonnaise and ketchup, then add Dijon mustard and spices. This sequence ensures a well-mixed sauce while avoiding any last-minute rush. Add Your Touch to Quick Smash Burger Sauce Feel free to swap out the mayonnaise for Greek yogurt for a tangy twist, or add sriracha for a spicy kick. Experiment with different herbs like dill or cilantro to create a unique flavor profile tailored to your taste. Storing & Reheating Quick Smash Burger Sauce Store your Quick Smash Burger Sauce in an airtight container in the fridge for up to one week. If it thickens, simply stir in a little milk or water to reach your desired consistency when ready to use. Sometimes, I whip this sauce up for burger nights and my friends rave about it. The last time, one friend exclaimed it was the best part of his meal, and let’s just say that boosted my cooking confidence dramatically! FAQs About Quick Smash Burger Sauce What is Quick Smash Burger Sauce? Quick Smash Burger Sauce is a delicious condiment designed to elevate your burger experience. Made primarily with mayonnaise and ketchup, this sauce adds a creamy and tangy flavor profile that pairs perfectly with grilled meats. The added spices, such as Dijon mustard, garlic powder, and paprika, contribute to a depth of flavor that can turn a simple hamburger into a gourmet meal. This sauce isn’t just for burgers; it also works wonderfully as a dip for french fries or veggies. How can I customize my Quick Smash Burger Sauce? You can easily customize Quick Smash Burger Sauce to suit your taste preferences. Try substituting mayonnaise with Greek yogurt for a healthier twist or add a hint of sriracha for a spicy kick. Fresh herbs like dill or cilantro can also enhance the flavor profile. Mixing in a splash of pickled jalapeños or diced onions can create a chunky texture that adds even more excitement to your burgers. How long can I store Quick Smash
Easy Soft Pretzel Bites Recipe for Perfect Homemade Snack

The aroma of freshly baked Soft Pretzel Bites wafting through your kitchen brings an overwhelming sense of comfort and warmth. Picture yourself pulling them out of the oven: golden-brown, soft, and slightly crispy on the outside. The perfect little nugget of nostalgia that transports you back to your childhood adventures at the county fair, where you eagerly devoured every bite and wiped away the salt with a grin. There’s something utterly magical about the chewy texture of a warm pretzel, especially when paired with a tangy mustard dip or gooey cheese. As these delightful morsels puff up while baking, your heart races with anticipation, knowing that these Soft Pretzel Bites are destined to become your new favorite snack. Whether it’s a cozy movie night, a game day feast, or a casual gathering with friends, these pretzels are sure to steal the show and create moments that make memories. Ingredients for Soft Pretzel Bites Here’s what you’ll need to make this delicious Soft Pretzel Bites: 4 cups all-purpose flour – Essential for a chewy texture, this is the backbone of your pretzel bites. 2 1/4 teaspoons active dry yeast – This helps your dough rise and gives those pretzels their characteristic fluffiness. 1 1/2 cups warm water – The warmth activates the yeast, aiding in the dough’s rise, so make sure it’s not too hot or too cold. 1/4 cup baking soda – The key ingredient in the boiling water bath that gives pretzels their unique flavor and rich brown color. 1 teaspoon coarse sea salt – This elevates the flavor of your bites, ensuring each one bursts with salty goodness. 4 tablespoons unsalted butter – Melted and brushed on top, it adds richness and a glossy finish to your pretzel bites. How to Make Soft Pretzel Bites Follow these simple steps to prepare this delicious Soft Pretzel Bites: Step 1: Prepare the Dough In a large bowl, combine warm water and active dry yeast. Let it sit for about 5 minutes until it’s bubbly and frothy—this is the yeast awakening and getting ready to party. Stir in the flour and salt until a shaggy dough begins to form. Step 2: Knead the Dough Transfer the dough onto a floured surface. This is where the fun begins: knead it for about 5 minutes until it’s smooth and elastic. It’s a bit of a workout, but your pretzel bites will thank you later. Step 3: Let the Dough Rise Place the kneaded dough into a greased bowl, cover it with a clean towel, and let it rise in a warm area for about an hour or until doubled in size. This is the perfect time to contemplate life choices or consider what delicious toppings you’ll put on these bites! Step 4: Shape the Bites Once the dough has risen, punch it down like you would after a bad day. Divide the dough into small portions and roll each piece into ropes about an inch thick. Cut those ropes into bite-sized pieces, roughly 1-inch long. Step 5: Boil the Bites In a large pot, bring 10 cups of water mixed with the baking soda to a gentle boil. Wearing your superhero apron, carefully drop the pretzel bites into the pot for about 30 seconds each, then rescue them with a slotted spoon. They will puff up slightly—magic is happening right before your eyes! Step 6: Bake Until Golden Preheat the oven to 450°F (230°C). Place the boiled bites on parchment-lined baking sheets. Brush them lovingly with melted butter, sprinkle coarse sea salt generously on top, and bake for 10-12 minutes until they turn a beautiful golden brown. Transfer your glorious Soft Pretzel Bites to a serving platter, serve them warm with your favorite dipping sauces, and get ready for the hugs and cheers from your family and friends. Each bite is a moment of pure joy, perfect for sharing or, let’s be honest, keeping all to yourself while binge-watching your favorite series. So, roll up those sleeves, grab your ingredients, and get baking! Your new obsession awaits. Enjoy the delightful journey of making these mouthwatering Soft Pretzel Bites, and who knows? You might just find yourself making them on repeat! Perfecting Soft Pretzel Bites Cooking Process Start by mixing yeast in warm water to activate it while preparing your flour and salt blend. Knead the dough together while letting water boil for the pretzel bites’ bath. Finally, bake your bites while they rise for efficiency, ensuring a perfect outcome. Add Your Touch to Soft Pretzel Bites Feel free to swap in whole wheat flour for a healthier option or add spices like garlic powder or smoked paprika for a flavor kick. You can also try different toppings, like everything bagel seasoning or Parmesan cheese, to make these bites uniquely yours. Storing & Reheating Soft Pretzel Bites Store your Soft Pretzel Bites in an airtight container at room temperature for up to two days. When reheating, pop them in the oven at 350°F for a few minutes to revive their soft, chewy texture. The first time I made these Soft Pretzel Bites was during a family game night, and they disappeared faster than I could say “They’re homemade!” Everyone became instant fans, demanding the recipe. It was a heartwarming moment that turned my kitchen into a mini pretzel factory! FAQs About Soft Pretzel Bites What is Soft Pretzel Bites? Soft Pretzel Bites are delightful, bite-sized treats made from a simple dough that transforms into a perfect balance of chewy and soft textures. They’re similar to traditional pretzels but cut into smaller pieces, making them ideal for snacking. Often enjoyed warm and brushed with melted butter, they are typically sprinkled with coarse sea salt for that iconic flavor. These pretzel bites can be served with dipping sauces like cheese or mustard, making them a hit at parties, game nights, or even just a cozy evening at home. How do I store leftover Soft Pretzel Bites? To keep your Soft Pretzel Bites fresh, store them
Delicious Ricotta Dip with Hot Honey Recipe for Easy Snacking
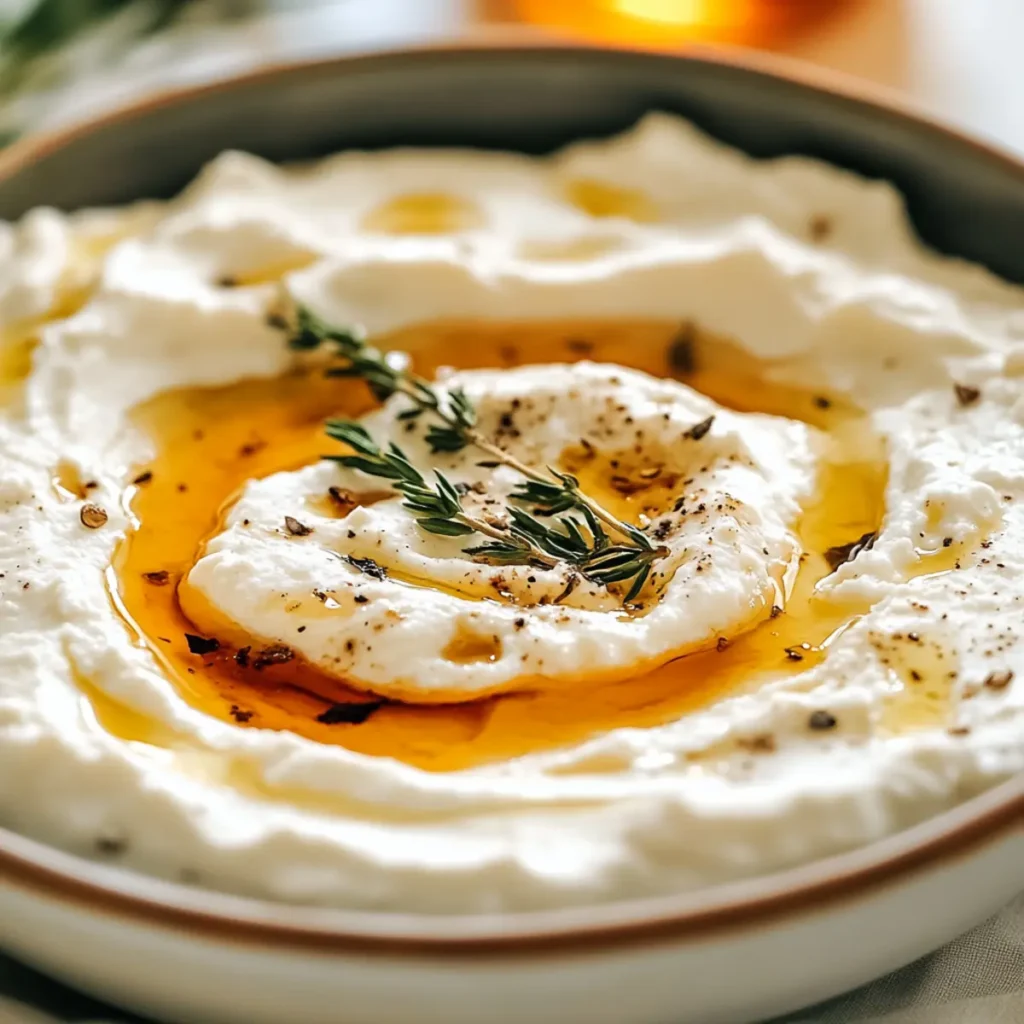
There’s something truly magical about a creamy dip that dances in perfect harmony with a drizzle of sweet heat. This Ricotta Dip with Hot Honey does just that—creating a delightful fusion of smooth, slightly tangy ricotta and a touch of spice that leaves your taste buds singing. Imagine dipping fresh veggies or warm bread into this velvety concoction, each bite igniting a celebration of flavor that feels like a warm hug on a plate. Every gathering or quiet evening at home calls for something special, and this dip shines in any setting. Whether you’re hosting a casual get-together or indulging in a cozy night in, this Ricotta Dip will steal the show. Trust me, once you introduce this dynamite recipe to your life, there’s no going back. Ingredients for Ricotta Dip with Hot Honey Here’s what you’ll need to make this delicious Ricotta Dip with Hot Honey: 1 cup fresh ricotta cheese – Look for a high-quality ricotta for the creamiest texture and best flavor. 2 tablespoons hot honey – This sweet and spicy honey takes this dip to the next level. Use your favorite brand or make your own! Zest of 1 lemon – This adds a bright flavor that beautifully complements the creaminess of the ricotta. 1/4 cup chopped fresh basil leaves – Fresh basil brings a refreshing, aromatic note. Make sure to chop it finely for even distribution. 1/2 teaspoon sea salt – A pinch of salt enhances all the flavors and balances the sweetness. How to Make Ricotta Dip with Hot Honey Follow these simple steps to prepare this delicious Ricotta Dip with Hot Honey: Step 1: Combine Ricotta and Lemon Zest In a mixing bowl, add the fresh ricotta cheese and lemon zest. Stir them together until the mixture becomes creamy and smooth—this is where the magic starts. Step 2: Add Fresh Basil and Sea Salt Now it’s time to infuse more flavor! Stir in the chopped fresh basil leaves and sea salt. Mix them well so every dollop of the dip gets that herbaceous flavor. Step 3: Transfer to a Serving Bowl Scoop the beautifully blended ricotta mixture into a serving bowl. Don’t skimp on this step; present it nicely because we eat with our eyes first! Step 4: Drizzle Hot Honey Here comes the fun part! Generously drizzle hot honey over the dip. Don’t be shy; let the honey cascade over the surface—it’s a showstopper, and your guests will be eager to dive in. Step 5: Garnish and Serve For an added touch of color, you can sprinkle some additional chopped basil on top. Serve the dip immediately with your choice of dippers—be it crunchy veggies, crusty bread, or even chips. Step 6: Enjoy! Get ready for an explosion of flavors. Each scoop will make you wonder why you didn’t make this dip sooner. And just like that, you have a stunning Ricotta Dip with Hot Honey that’s as enjoyable to make as it is to eat! Whether you’re sharing it with friends or keeping it all to yourself during a Netflix binge, it’s truly a winner. With its vibrant colors and flavor-packed ingredients, this dip promises comfort and indulgence in every bite. Don’t miss the chance to whip up this easy yet impressive dish that is beyond perfect for any occasion. So gather your ingredients, channel your inner chef, and let the deliciousness begin! Perfecting Ricotta Dip with Hot Honey Cooking Process Start by combining fresh ricotta cheese and lemon zest in a mixing bowl, blending until creamy. Fold in chopped basil and sea salt next to achieve flavor harmony. Finally, transfer it to your serving bowl and drizzle on that delectable hot honey. Add Your Touch to Ricotta Dip with Hot Honey Feel free to swap out fresh basil for other herbs like thyme or chives for a unique twist. You can also experiment by adding crushed garlic for a savory punch or use flavored honey like lavender for an intriguing flavor profile. Storing & Reheating Ricotta Dip with Hot Honey To store your Ricotta Dip with Hot Honey, cover it tightly and refrigerate for up to three days. For reheating, simply bring it to room temperature before serving, as ricotta can become grainy if heated. Sharing this Ricotta Dip with Hot Honey at family gatherings has always been a hit; it’s wonderful to see everyone forgetting their diets for just a moment, diving in with happy faces and fighting for the last dip! FAQs About Ricotta Dip with Hot Honey What is Ricotta Dip with Hot Honey? Ricotta Dip with Hot Honey is a delightful blend of creamy ricotta cheese, zesty lemon, fresh basil, and a drizzle of sweet and spicy hot honey. This quick and easy appetizer elevates your snacking game with its unique flavor combination. Ideal for gatherings or a cozy night in, it invites everyone to dip in. The creamy texture of the ricotta is wonderfully complemented by the warm, spicy notes of hot honey, creating a memorable experience that keeps everyone coming back for more. How do you serve Ricotta Dip with Hot Honey? Serving Ricotta Dip with Hot Honey is simple and versatile. Gather dippers like crunchy breadsticks, crisp vegetables, or toasted baguette slices. The dip can shine at appetizer platters, parties, or casual game nights. Arrange your dippers around the serving bowl filled with the ricotta dip, making it visually appealing. Optionally, you can add fresh basil leaves on top for an inviting presentation that adds a pop of color. This dip is sure to impress and satisfy everyone’s cravings. Can you customize Ricotta Dip with Hot Honey? Absolutely! One of the best things about Ricotta Dip with Hot Honey is its adaptability. You can replace fresh basil with herbs like thyme or chives for a different flavor profile. Feel free to add some crushed garlic or even diced sun-dried tomatoes for an extra kick. If you prefer a hint of floral sweetness, try substituting flavored honey, such as lavender. These variations allow
Delicious Cowboy Caviar Recipe: Fresh and Flavorful Salsa Dip
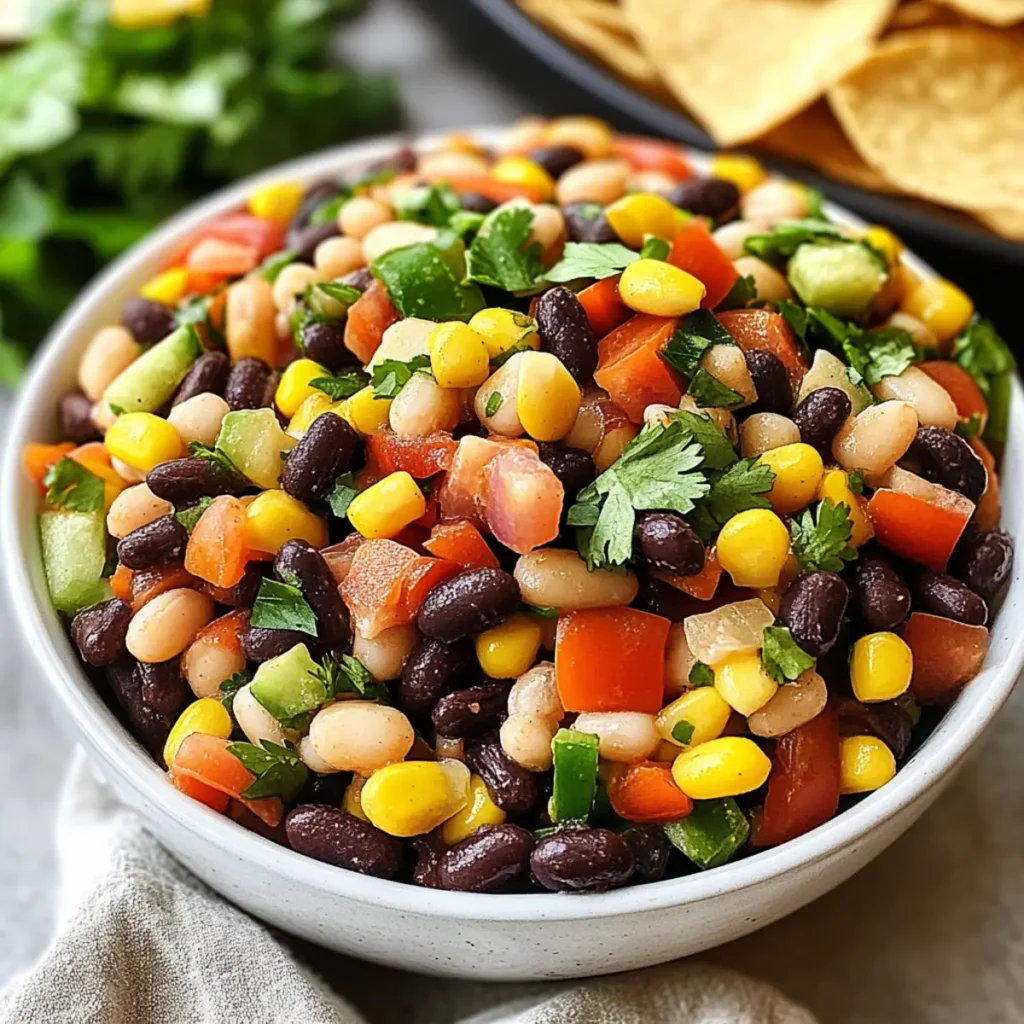
Cowboy Caviar is not just some ordinary dip; it’s a vibrant celebration of flavors and colors that bursts with zest in every bite. Imagine sitting under the sun, crunching tortilla chips while enjoying this refreshing mix of beans, corn, avocado, and tangy lime—a fiesta in a bowl, if you will. The best part? This dish is quick to whip up, making it perfect for spontaneous get-togethers or cozy nights at home. It’s the kind of delight that instantly brings people together, so prepare for a scoop or two (or five). Digging into Cowboy Caviar feels like catching up with an old friend: familiar yet exciting. Perhaps you remember taking it to that summer barbeque last year, where it vanished in a matter of minutes. Or how it effortlessly transformed a lazy Wednesday dinner into a lively feast. You’re in for a treat that doesn’t just satisfy your hunger; it nourishes your spirit with its delightful crunch and zest. So let’s gather around and get ready to make this outstanding concoction that will have everyone coming back for another scoop! Ingredients for Cowboy Caviar Here’s what you’ll need to make this delicious Cowboy Caviar: – 1 can (15 oz) black beans – Drained and rinsed, these are the protein powerhouse of the dish, adding a hearty texture. – 1 cup sweet corn – Use canned or frozen; it brings a sweet crunch that contrasts beautifully with the other ingredients. – 1 cup cherry tomatoes – Halved, these tiny jewels add freshness and a pop of color that makes your dip visually appealing. – 1/2 cup red onion – Finely chopped, it provides a sharp bite that balances the sweetness of corn and tomatoes. – 1 ripe avocado – Diced; this creamy element enriches the dip and adds a luxurious mouthfeel. – 1/4 cup fresh cilantro – Chopped; it delivers a fresh, herby flavor that gives Cowboy Caviar its refreshing quality. – Juice of 2 limes – This zesty ingredient brightens up the dip beautifully, while its acidity enhances all the flavors. – 2 tbsp olive oil – Helps to meld the ingredients together and adds a lovely richness without overpowering the dish. – Salt and pepper – To enhance the flavors; these staples pull everything together perfectly. How to Make Cowboy Caviar Follow these simple steps to prepare this delicious Cowboy Caviar: Step 1: Gather Your Ingredients Before diving in, make sure all your ingredients are fresh and ready. Grab your bowls, utensils, and everything you need to make the process smoother. Step 2: Rinse and Prep Rinse and drain the black beans and corn under cold water. This not only cleans them but keeps your Cowboy Caviar from becoming too soggy. Step 3: Chop Your Veggies Chop the cherry tomatoes, red onion, and avocado into bite-sized pieces. The key is to ensure everything is roughly the same size for that perfect mouthful of flavor. Step 4: Combine Ingredients In a large mixing bowl, combine the black beans, corn, tomatoes, red onion, avocado, and cilantro. Toss everything gently so you don’t turn your avocado into mush—unless you fancy guacamole instead. Step 5: Dress the Caviar Drizzle the lime juice and olive oil over the mixture, then sprinkle with salt and pepper. Mix gently until well combined and each ingredient is coated in that zesty goodness. Step 6: Chill and Serve Chill in the fridge for at least 30 minutes. This allows the flavors to meld beautifully together. When ready, serve with crispy tortilla chips or as a side to grilled meats for a delightful touch. Cowboy Caviar is one dip that never fails to impress, whether you’re at a barbecue, hosting game day, or just want to liven up a weeknight dinner. It’s fresh, flavorful, and versatile enough to suit different occasions. Every crunchy bite is a burst of satisfaction! Make sure to share this recipe with friends—they’ll definitely want to join in on the foodie fun. Enjoy! This showstopping Cowboy Caviar delivers restaurant-quality results using simple ingredients you probably already have at home. The perfect balance of textures and flavors creates an unforgettable dining experience that will have everyone asking for seconds. Picture-perfect presentation with vibrant colors makes this dish absolutely Instagram-worthy and guaranteed to impress any dinner guest. Incredibly versatile recipe that works beautifully for weeknight dinners, meal prep, special occasions, or even outdoor entertaining sessions. Perfecting Cowboy Caviar Cooking Process Begin by preparing your ingredients. Rinse and drain the black beans and corn while you chop the tomatoes, onions, and avocado. Toss everything in a bowl and drizzle with lime juice and olive oil for maximum flavor. Add Your Touch to Cowboy Caviar Feel free to swap the black beans with pinto beans or add diced bell peppers for extra crunch. For a spicy kick, toss in some diced jalapeños or a dash of hot sauce. Storing & Reheating Cowboy Caviar To keep your Cowboy Caviar fresh, store it in an airtight container in the fridge for up to three days. No reheating necessary; it’s best enjoyed chilled! Nothing makes me happier than serving this Cowboy Caviar at family gatherings. My grandma even asked for the recipe last time, claiming it was the best dip she’d ever tasted. FAQs About Cowboy Caviar What is Cowboy Caviar? Cowboy Caviar is a vibrant, refreshing salsa-like dip that blends black beans, sweet corn, tomatoes, avocado, and onions with a zesty lime dressing. This versatile dish not only serves as an appetizing snack or party dip but also pairs beautifully with grilled meats. Its colorful ingredients and bold flavors make it a crowd favorite at gatherings, picnics, and barbecues. Whether you’re looking for a healthy snack or an impressive dish to serve, Cowboy Caviar hits the spot! How do you serve Cowboy Caviar? Serving Cowboy Caviar is a breeze! Popular ways to enjoy it include serving with crispy tortilla chips for dipping, drizzling over tacos, or pairing with grilled chicken or fish. You can also use it as a topping for
Delicious Loaded Potato Skins Recipe with Cheese and Bacon

Nothing screams comfort food quite like crispy, cheesy Potato Skins, fresh from the oven, golden and bubbling with irresistible flavors. Picture this: thick russet potato shells, perfectly baked until the insides are fluffy, and then filled to the brim with melted sharp cheddar and crispy bacon. The aroma wafting through your kitchen is enough to coax even the most discerning family members away from their screens. Potato Skins are not just a side dish; they are a full-fledged adventure in flavor that’ll have everyone clamoring for more. Now, let me take you down memory lane. I can still remember the first time I tasted Potato Skins at a local pub, served piping hot with a dollop of sour cream and a sprinkle of fresh chives. It was like a flavor explosion, and instantly, I was hooked. Fast forward to today, and these golden delights have become a staple at my dinner parties, game nights, and even quiet evenings when only comfort food will do. Trust me, when you pull these beauties out of the oven, you’ll feel like a culinary superhero, and your taste buds will thank you profusely. Ingredients for Potato Skins Here’s what you’ll need to make this delicious Potato Skins: 4 medium russet potatoes – The backbone of this recipe; choose firm potatoes with no blemishes for the best results. 1 cup shredded sharp cheddar cheese – Offers a robust flavor that melts beautifully; feel free to substitute with a blend for a twist. 1/2 cup cooked and crumbled bacon – Adds that delightful crunch and smoky flavor. Make sure it’s crispy for the best results. 1/2 cup sour cream (or Greek yogurt) – A creamy topping that balances out the richness of the cheese and bacon; Greek yogurt adds a healthy kick. 2 tbsp chopped fresh chives – For a burst of freshness and a lovely pop of color on the finished dish. 2 tbsp olive oil for brushing – Ensures that the potato skins turn perfectly crispy in the oven. Salt to taste – A crucial seasoning that brings out all the flavors. How to Make Potato Skins Follow these simple steps to prepare this delicious Potato Skins: Step 1: Preheat the Oven Preheat your oven to 400°F (200°C). This ensures the perfect temperature for crispy skin and melty cheese, so it’s a critical first step. Step 2: Prepare the Potatoes Wash and dry the russet potatoes thoroughly. Use a fork to pierce each potato a few times. This helps steam escape during the baking process and prevents any unexpected potato explosions. Step 3: Bake the Potatoes Place the potatoes directly on the oven rack and bake for 45-60 minutes until tender. The skins should be crispy, and the insides should be fluffy. Let them cool slightly so you don’t risk burning your hands. Step 4: Scoop and Season Cut each potato in half lengthwise and scoop out most of the flesh, leaving about a quarter-inch layer of potato to keep them sturdy. Brush the skins on both sides with olive oil, sprinkle generously with salt, and position them skin-side down on a baking sheet. Step 5: Fill and Bake Again Load each potato skin with shredded cheddar cheese and crumbled bacon. Don’t be shy; pack them full! Return the filled skins to the oven for another 15-20 minutes until the cheese is melted and bubbly, creating a tempting golden top. Step 6: Serve and Enjoy Once your Potato Skins are done, remove them from the oven, and let the aroma waft through your kitchen like a warm hug. Top each skin with a generous dollop of sour cream and a sprinkle of fresh chives. Voilà! Serve hot and watch them disappear. So there you have it! This Potato Skins recipe is not just a dish; it’s an experience. Whether you’re having a casual movie night at home, hosting hungry friends for game day, or simply treating yourself to something special, these Potato Skins are sure to be an instant crowd-pleaser. The combination of crispy skin, gooey cheese, and savory bacon is an unbeatable partnership. Happy cooking! Perfecting Potato Skins Cooking Process Start by baking the potatoes until tender, then scoop and prepare the skins while the cheese and bacon await their turn in the oven. This sequence ensures everything is fresh and perfectly timed for serving. Add Your Touch to Potato Skins Feel free to mix and match! Swap out cheddar for pepper jack for some spice or toss in diced jalapeños for an extra kick. Avocado lovers can add sliced or guacamole for a creamy twist. Storing & Reheating Potato Skins Store leftover potato skins in an airtight container in the fridge for up to three days. Reheat in the oven at 350°F for 10-15 minutes or until warmed through for best results. Sharing my first experience with potato skins brings back fond memories of fumbling through a family gathering. I attempted to impress my relatives, who devoured them in minutes—proof that good food is always a crowd-pleaser! FAQs About Potato Skins What are Potato Skins? Potato skins are a popular appetizer or snack made from the outer layer of baked potatoes. After baking the potatoes until they are tender, the flesh is scooped out, leaving a crispy shell ready to be filled. They are typically loaded with ingredients like cheese, bacon, and chives, then baked again until the toppings are melted and deliciously golden. This dish is perfect for party snacks or cozy nights at home, bringing comfort food to a whole new level. How do you store and reheat Potato Skins? To store leftover potato skins, make sure they cool completely before placing them in an airtight container. They can be kept in the refrigerator for up to three days. When it’s time to enjoy them again, preheat your oven to 350°F and reheat the potato skins for about 10-15 minutes. This ensures they regain their crispy texture while warming the delicious fillings. Avoid reheating them in the microwave, as
Deliciously Creamy Jalapeño Popper Dip Recipe in 35 Minutes
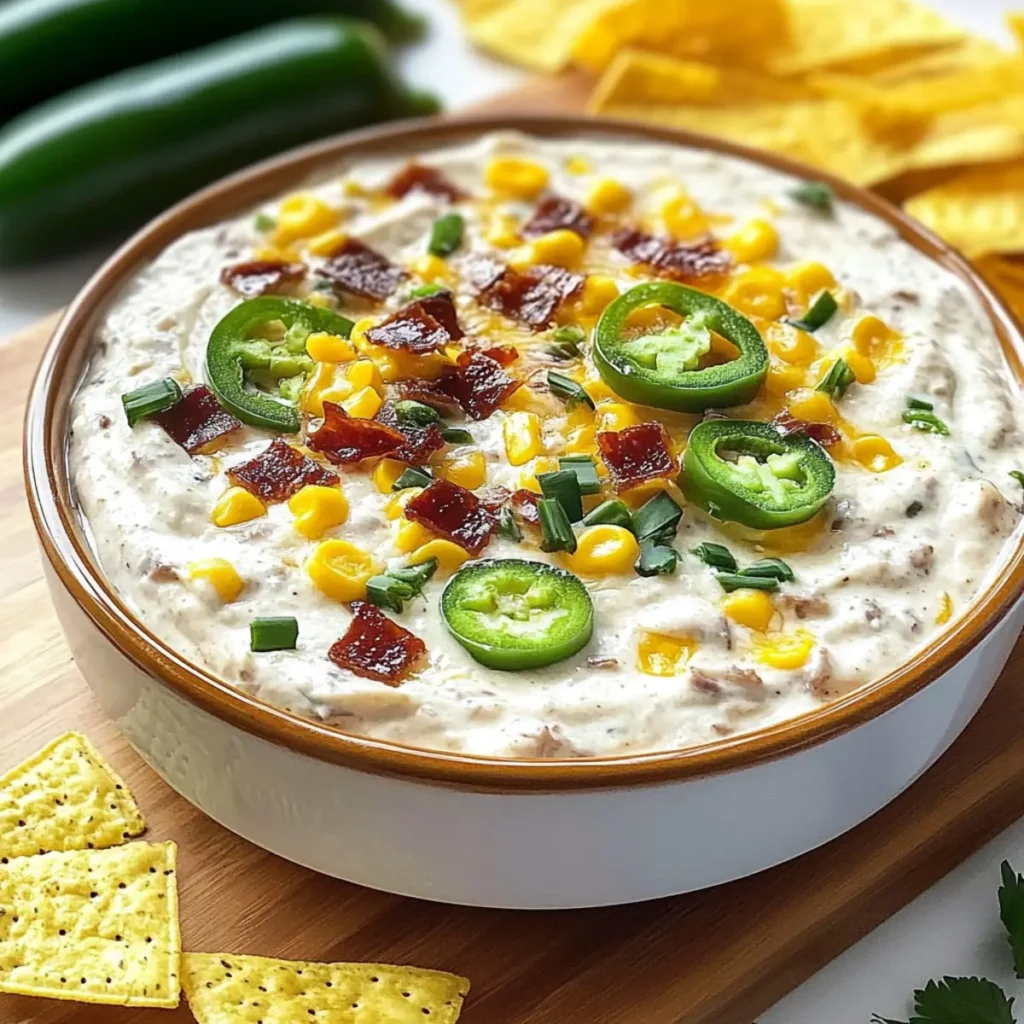
There’s something inherently magical about the scent of a fresh batch of Creamy Jalapeño Popper Dip wafting through the kitchen. Imagine the comforting aroma of baked cream cheese mingling with the spicy zing of fresh jalapeños and the rich, savory punch of cheddar cheese. Your taste buds are already buzzing in anticipation, aren’t they? Whether you’re hosting a gathering, celebrating game day, or simply indulging in a cozy night in, this dip is guaranteed to be the star of the show. There’s a reason I hold this creamy delight so close to my heart. Years ago, at my best friend’s birthday party, I stumbled upon a similar recipe. As we devoured the dip with reckless abandon, I could practically hear our collective “oohs” and “aahs” echoing throughout the room. It was a delightful moment that wrapped us in warmth and laughter. This Creamy Jalapeño Popper Dip isn’t just a recipe; it’s a memory maker, perfect for sharing with friends and family during any occasion that calls for food and fun. Ingredients for Creamy Jalapeño Popper Dip Here’s what you’ll need to make this delicious Creamy Jalapeño Popper Dip: 8 oz Cream Cheese – Softened to room temperature for easy mixing, this provides the rich, creamy base of the dip that everyone loves. 1 cup Shredded Cheddar Cheese – Aged, sharp cheddar works beautifully for that bold flavor, but feel free to substitute with your preferred cheese. 1/2 cup Sour Cream – Adds tanginess and depth to the dip, making it even creamier. Low-fat options can be used for a lighter version. 1-2 Fresh Jalapeños – Diced finely for that spicy kick; adjust the amount to match your taste preferences. 1/4 cup Green Onions – Chopped to add a fresh crunch and mild onion flavor, enhancing the overall taste of the dip. 1 teaspoon Garlic Powder – A must-have for a savory kick; it brings everything together beautifully. 1/2 teaspoon Onion Powder – Adds a subtle sweetness and depth to the mixture. Salt and Pepper (to taste) – Essential seasoning to enhance all the flavors in this creamy masterpiece. How to Make Creamy Jalapeño Popper Dip Follow these simple steps to prepare this delicious Creamy Jalapeño Popper Dip: Step 1: Preheat Your Oven Begin by preheating your oven to 350°F (175°C). Get your baking dish ready by greasing it lightly with cooking spray or a bit of olive oil to ensure your dip doesn’t stick. Step 2: Blend the Creamy Base In a mixing bowl, take your softened cream cheese and sour cream. Blend them together until they are smooth and creamy. This will serve as the luscious base of your dip; make sure there are no lumps! Step 3: Season it Up Add the garlic powder, onion powder, salt, and pepper to the creamy mixture. This is where the flavor magic begins, so mix it all well until everything is combined and tasting fabulous. Step 4: Fold in the Goodies Gently fold in the shredded cheddar cheese, diced jalapeños, and chopped green onions. Take your time here – you want to ensure that every bite of your dip has the perfect blend of flavors happening. Step 5: Transfer and Spread Pour the mixture into your prepared baking dish. Use a spatula to spread it evenly, making sure those tasty ingredients are well-distributed. Step 6: Bake to Perfection Pop your dish into the oven and bake for 25-30 minutes. Keep an eye on it – you’ll know it’s ready when the top is bubbly and slightly golden. You may want to remove it from the oven a tad early to avoid over-browning, but let’s be honest, nobody really minds a little extra crisp. Once it cools slightly, you’re ready to dive in. Serve it warm alongside some crispy tortilla chips or fresh veggie sticks, and watch your guests become utterly enchanted by the vibrant flavors. Creamy Jalapeño Popper Dip isn’t just a dip; it’s an experience! From the first crackle of the chip breaking through the surface to the joyful sounds of satisfying “mmms”, this dish is a guaranteed hit. You’ll find yourself sharing stories and laughs as you indulge, making every bite a beautiful memory in the making. So gather around with your favorite people, dip away, and let the fun begin! Perfecting Creamy Jalapeño Popper Dip Cooking Process Getting the sequence right is key. Start by preheating your oven, then mix the creamy ingredients first. Fold in the jalapeños and cheese, and transfer to the baking dish for the final bake. This method ensures a seamless and enjoyable cooking experience. Add Your Touch to Creamy Jalapeño Popper Dip Feel free to customize your dip. Swap out cheddar for pepper jack for an extra kick, or add some crumbled bacon for richness. You can also play with the spice level by adjusting the amount of jalapeños used—make it as mild or fiery as you like! Storing & Reheating Creamy Jalapeño Popper Dip Store leftovers in an airtight container in the fridge for up to four days. When reheating, cover with foil to prevent over-browning and heat at 350°F until warmed through. This will help maintain that creamy texture we all love. When I first made this dip for a casual gathering, I was surprised by how everyone flocked to the table, giving me raving reviews. It’s moments like these that fill the kitchen with laughter and joy, making cooking so rewarding. FAQs About Creamy Jalapeño Popper Dip What is Creamy Jalapeño Popper Dip? Creamy Jalapeño Popper Dip is a rich and flavorful appetizer that combines cream cheese, sour cream, shredded cheddar, and fresh jalapeños. It’s baked until bubbly and golden, perfect for dipping chips or veggies. This dip brings together creamy, spicy, and cheesy elements for an irresistible experience. Whether you’re hosting a gathering or simply enjoying a night in, this dip is sure to be a crowd-pleaser. How can I make my Creamy Jalapeño Popper Dip spicier? To kick up the heat in your Creamy Jalapeño Popper Dip,